I got a new Apple iPhone 4S and realized that it shoots 1080p HD video and immediately thought that it might be good enough to use for my videos of this show. I did some testing and it worked great. Watch this video and see how well it works.
Archive for the ‘Article’ Category
Videoing With My iPhone 4S
Thursday, December 8th, 2011REVISITED: How to Make YOUR Own Tree Stand Safety System
Monday, October 17th, 2011Back in August 2010, I wrote an article and shot a short video on, “How to Make YOUR Own Tree Stand Safety System“. Well, the video has gotten over 6,200 hits and I could not understand why I had so many dislikes. I watched the video and saw that the video got messed up during the upload process and it goes black after a few minutes into the video. So I was not happy with the video and I re-shot the video with more explanation on how to make this safety system. Click here to view my article that has the instructions on how to make your own safety system. Enjoy this video and please be safe when you are up a tree.
Disappointed with the Quality Deer Management Association (QDMA)
Thursday, April 21st, 2011 I am VERY disappointed in the Quality Deer Management Association (QDMA) and here is why! I am not going to turn this blog post into whether you are for or against baiting in the state of Georgia BUT instead of something I see as just wrong and misleading and I want to point it out. Full disclaimer, I am for baiting in Georgia and I am a non-resident hunter from Florida that leases land in Georgia.
The problem I have is with the Quality Deer Management Association. I have praised them for years in spreading their programs and the leadership they have taken in educating hunters on how to grow healthier and bigger deer BUT their stance against baiting just upsets me. I have been a member of their association and our hunting lease buys our liability insurance from them. I have been proud to support them with this business. The fact that they use my money and speak against something I feel is a hunter’s right is just wrong. Whether you are for the baiting bill or against, imagine them speaking against you in any case.
Every biologist that works for them can have their opinion but do not use the QDMA pulpit to preach against what I and many consider a hunter’s rights. What if QDMA was against deer hunting with cross bows and voiced their opinion on that under the QDMA banner based on the fact that they think it is unethical? Since they are a non-profit organization, they should remain neutral on topics like this. Especially since there has not been any scientific evidence that baiting deer causes harm to the health of the herd. If they could prove that it does, then they should be the ones standing up and yelling no to baiting based on science. This opinion based situation would be like if the National Rifle Association (NRA) was for citizen’s gun rights but they said it would be okay to take assault rifles. The NRA is against any guns being taken way from citizens just like QDMA should not be against any hunters’ rights.
Brian Murphy, CEO of QDMA, has been all over the newspapers voicing QDMA’s position against baiting in Georgia. QDMA even has included this in their “REACH in Action!” program (http://www.qdma.com/programs/reach-in-action/). From their Website: “Under the Advocacy arm of REACH, QDMA gets involved in numerous whitetail issues annually.” and “From January to November 2010, QDMA engaged in 38 policy or management issues in 15 states (CT, DE, GA, IN, KY, MD, MI, MN, NH, NY, OH, PA, SC, VA, VT) including: * Opposing a bill to change baiting laws in Georgia…”
After researching all of QDMA’s arguments they basically have come up with two; both opinion based. They feel it is unethical and it gives hunters a bad vision to the anti-hunter establishment. I said I was not going to turn this into a baiting debate but I do have to make one comment. I have never heard them lobby against states that have baiting legally, such as Texas. I have never heard them tell people to stop cutting standing corn to attract deer. Does this sound like hypocrisy?
To me, QDMA should be like Switzerland and remain neutral only to step in if science is founded to be truthful. QDMA is an organization that does not have an opinion. If a person who is associated with QDMA wants to voice their opinion then he or she should do so and make it clear that they are not speaking on behalf of QDMA.
Because of their actions, I am going to pull all my money from them including my membership and club lease liability insurance. I hate to do this because I really enjoy their research BUT I am not going to support an organization that is going to campaign against hunter’s rights based on their individual opinions. I would love to know how many QDMA members support their operations that are for baiting in Georgia. I wonder if these members knew how strong a stance they take on this topic, would they still be members? I encourage you to withdraw your support and tell them why you are no longer supporting them. I will be glad to support them in the future if they become a non biased organization and quit taking sides against hunters.
BuckScore – Software Review
Monday, December 20th, 2010 Let me preface this review with the fact that I am a Mississippi State University graduate (Aerospace Engineer 1994) and that this product was developed by fellow Bulldogs and by the greatest college in the nation. So with that said, everyone knows that I was bias to begin with.
 I first discovered the BuckScore software scoring system while reading my Quality Whitetail magazine produced by Quality Deer Management Association (QDMA). As you guys know how big a nut I am about my trail cameras and how I deploy them year round, I immediately got excited about the possibility of adding a new tool to my trail camera tool box. In the middle of reading it, I got up and proceeded to buy the software which cost only $10 at BuckScore.com. I then downloaded and began to install it. Now I also write software for my main income and I was not too excited to watch the setup program install a bunch of computer software packages. Then it wanted to reboot my machine and then install some more. This makes me start to second guess my decision BUT after all the installing, the software started right up. My experience with software is to keep it dumb and easy for average users and this whole process makes me wonder how many customers will fail or have to contact BuckScore for assistance. I would recommend them having it Web based so that all the software runs on a central server instead of deploying it to individual computers. The good news is this is the only thing I can say negative about the BuckScore software.
Now that I got the BuckScore software running, I immediately started making a list of bucks I wanted scored. I watched their demo/help videos to make sure I understood how the process works and what parts of the antlers to measure to give me the most accurate score. I figured to get the best product review of the BuckScore software I should score a trail camera photo of a buck that we have killed and then have a good friend of mine who is a taxidermist score the same deer. This will give us a one to one comparison. I was fortunate that my taxidermist friend had killed a nice buck that he wanted to test the BuckScore software on it also. That means 2 real life test cases.
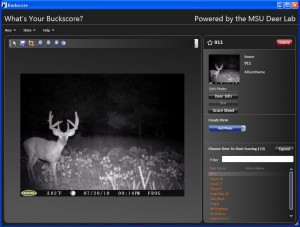
I am not going to go over the detailed steps on how to run the software, but I can tell you that you do not have to be an expert in scoring deer to use it. As a matter of fact if you can follow the instructions and look at the photo examples you will have no problems getting an accurate score. The whole concept is to import a trail camera photo of a buck where you can see all his scoreable points. It can be a head on shot which they call a zero degree shot, a side shot which they call a 90 degree shot, or an in between shot they call a 45 degree shot. I used the head on shot – 0 degree shot. An example of these three shot orientations are shown below.
 0 degrees |
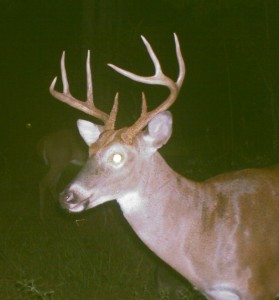 45 degrees |
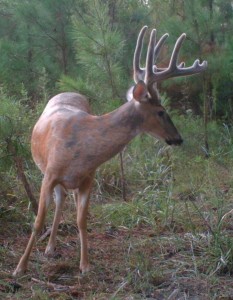 90 degrees |
Once you import your photo, you enter some basic information. The software takes into account what state the buck is located in, whether the antlers are in velvet or not, and age if you know it. The next important thing is to create a reference point to establish a measuring scale. They have different reference points such as ear widths (which is the best), eye to eye, nostril to nostril openings, etc… Once you have all this data entered, you then input the points and start measuring the antlers. The software will walk you through these measurements step by step. I found it really easy to do and user friendly. I captured this whole process in a video below.
Now that you have seen how to use the software, let me show you how accurate the scoring system is when comparing trail camera versus actual score. Now shown below is a deer I was fortunate to kill. He was named No Brow Jr. and was a 4 1/2 year old buck. He lived on our lease all summer and I got a ton of trail camera photos include a real good one to use with the BuckScore software. His actual score was 109 and his BuckScore’s score came to be 108.88. This was amazing to me because it was right on. BuckScore produces a print out of the score and I have converted it to a PDF file in which you can view it below.
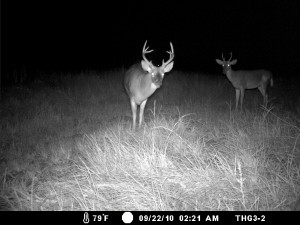 BuckScore: 108.88″ |
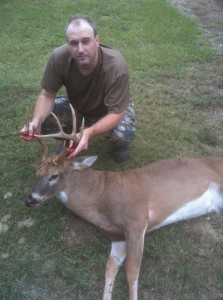 Actual: 109″ |
I was really impressed with how accurate it was so I was ready to test another one. I tested my friend’s 8 point buck and the actual score was 116 and BuckScore calculated it to be 110.91. This time it was off 5 inches so I started trying to figure out the difference. I came up with the conclusion that all of the deer’s antlers are not as clear in this photo as the previous one and his left G3 is obscured in the photo so I had a hard time figuring out where to start the line for measuring that tine. I am pretty sure that is where the difference came from BUT I was impressed enough for it to be that close to the actual score. I will take any score with an error deviation of plus or minus 5 inches.
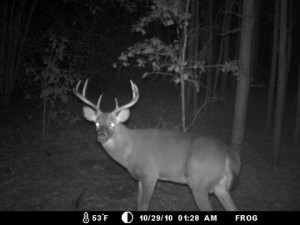 BuckScore: 111″ |
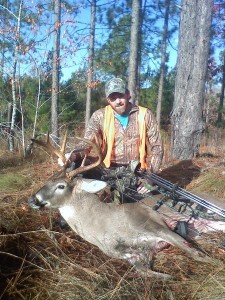 Actual: 116″ |
A few more bucks that I used the software to score are shown below with their scores.
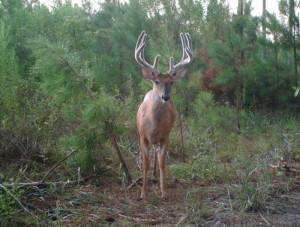 Crab Claw 10 – BuckScore: 155″ |
 911 – BuckScore: 150″ |
 Dam Buck – BuckScore: 120″ |
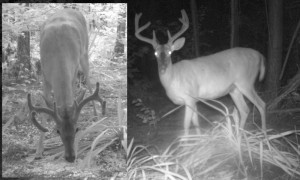 Mr. Potential – BuckScore: 110″ |
In conclusion, I strongly encourage hunters to purchase this software. Not only can you have a hit list of shooter bucks, but now you can know a good estimate as to what they score. So when you see them while hunting, you can already have your decision made as to whether you are going to shoot or not. Good stuff!
Moultrie ReAction Video Camera Review
Thursday, November 11th, 2010I bought a Moultrie ReAction camera (Link to Moultrie’s Official product page) to try out and possibly add it to my video arsenal. This 720p HD camera can be mounted in various ways and with a retail price of around $150 is very affordable for any hunter.
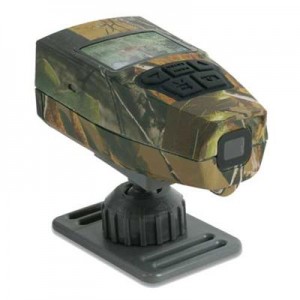
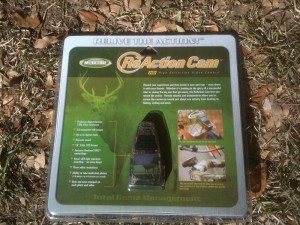
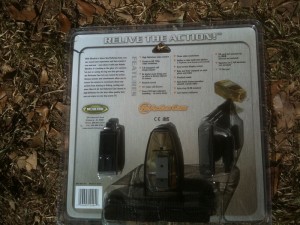
It runs off 2 AA batteries and can take up to a 16 Gb SD card. I used an 8 Gb SD card and it says on it’s display that it can record up to 2 1/2 hours of high definition video. It also records sounds and takes still 5 Mb photos. It has a 1.5″ LCD display where you can watch the videos back or if you dare, you can watch it LIVE while you video. I have found that the digital 8X zooms is useless due to how bad the pixels deform while using it. You can see this in one of my test video clips compiled below.
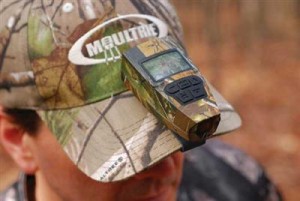
As mentioned before, there are various ways to mount and use the ReAction camera. It comes with a clip that will fix to your hat as shown below. Now to use this, you really have to practice, due to the fact that you might think you are filming in front of you while actually you are filming lower – sometimes your feet. You really have to have your hat pointed in an upward position. You can see this in one of the video clips compiled below.
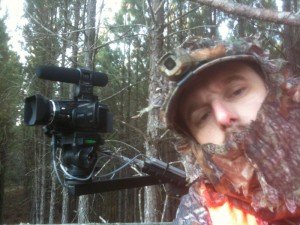
It also comes with a mounting bracket that allows you to mount it to the rail of a tree stand or something like that. You can then film out in front of you or you can make the ReAction a point of view (POV) camera. I have examples of these options in the video clip below. Since I used a good quality camera to film my hunts, I have been using the ReAction as a POV camera to film me while I am filming the hunt. I really liked this use and this is most likely how I am going to use it.
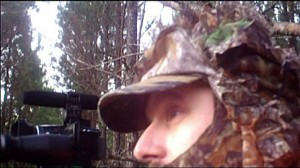
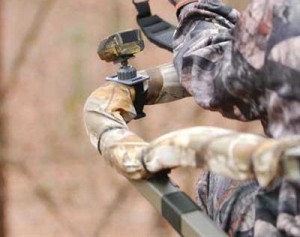
The other option is to free hand the camera. This works good, but as mentioned before, the 1.5″ LCD display can be challenging to see and once again you have to practice to get the shots you are wanting.
Now I was really disappointed in low light conditions, such as the last 15 minutes during the evening and first 15 minutes in the morning. Then I remembered that this was a $150 camera and that it did not have the technology needed to illuminate those kinds of shots and I quickly got over it. Now, I have 2 videos to demonstrate this condition in the test compilation video below.
Another reason I bought this camera was so that my Dad and 11 year old son can take it with them when they hunt. The idea that they can capture their hunt with an inexpensive camera was very appealing to me. I will have to get my Dad and son to practice, but whatever they video will be worth it. Stay tuned for these videos from them. It should be interesting.
Two of my hunting buddies also bought bought these ReAction cameras and they were nice enough to let me use some of their videos in this test demonstration video. So watch the video below to see all of these examples that I have talked about.
I recommend this camera to any hunter who wants to record that hunting moment. You have to practice with it and for the price and quality of video, can you afford not to buy one and throw it in your bag? Take it hunting and share your adventure with family and friends.
My Tribute to a Legend – Dick Kirby
Thursday, October 21st, 2010 I was very sad to hear about Mr. Dick Kirby passing away on October 1st due to back surgery complications. Mr. Kirby was the founder of Quaker Boy Game Calls where he revolutionized the way turkey hunters used game calls.
Mr. Kirby was an avid turkey hunter in which he killed 25 straight turkey Grand Slams. That amazes me to this day. Especially when you think of all the dynamic factors involved with turkey hunting, i.e. weather, birds not working, etc., plus the traveling involved within the short seasons for all 4 subspecies. Unbelievable!
Here is the story of my interaction with Mr. Kirby. I noticed Mr. Kirby while hunting on Gobblin Fever TV show with Mark Scroggins. I really noticed his long paddle box call and the beautiful calls coming from it. Of course he called a gobbler in on the show and he put the smack down on him. That call stuck in my head. Later that week, I got a mail order catalog, dedicated to turkey gear, and I was looking at the calls and I saw a limited edition “25 Grand Slams in a Row” handcrafted call by Mr. Kirby for sale. I thought it was beautiful and I loved his personal touches and workmanship.
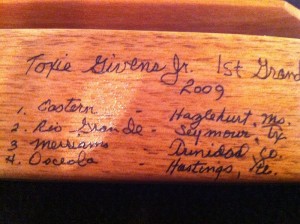
I need to back track a little to tell the whole story. My Dad and I decided a few years ago to kill the grand slam. We planned to take a trip to Texas to kill the Rio Grande and Colorado for the Merriam. At this time all he had left was the Osceola, and I had leased a place south of St. Augustine just for Osceola turkey hunting. I knew he was going to complete it and I wanted some way to celebrate his accomplishment. That’s when I saw Mr. Kirby’s call and an idea popped in my head.
This idea was to get my Dad a custom call made by one of the great call makers in the country and for him to personalize it. So I looked for a Website for Mr. Kirby and all that came up was Quaker Boy’s corporate site. Then I came across an article about making turkey calls where they were interviewing him. Luckily for me, he had included his personal email address at the bottom. It was too good to be true and I was nervous to email him, plus it was an AOL address and I thought he might not have used it anymore since the article was dated a few years back.
Well, I sent him an email telling him my story and how it would be special for me to get a call built to give to my Dad. A couple of hours later, he responded and told me he would be honored to make it but it would have to be after turkey season. This was March 1st, 2009. I laughed and sent him a reply saying I most definitely understood and good luck.
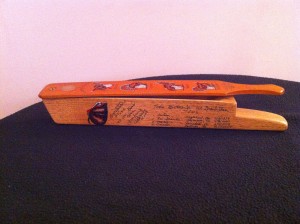
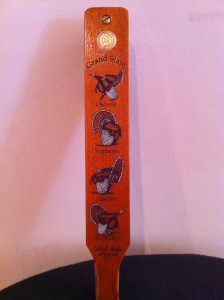
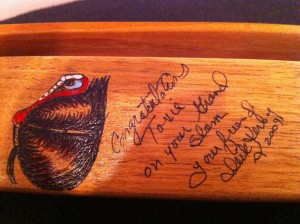
So, May 1st, he emailed me with a price and wanted to know the information for the personalization I wanted. Then around first of June it came in the mail. When I opened it up I was shocked at how beautiful it was. I have some photos below of this call but it does not give it justice. The wood he used was perfect; the color was flawless. Then I had to try it out so I dragged the handle across the top to make a call and it had perfect tone and pitch. Then I noticed his personal address to my Father congratulating him of his accomplishment. I was so touched and so proud of it. I could not wait to give it to my Dad. I sent Mr. Kirby an email thanking him and he wrote me back saying he smiled while making it because it brought back memories and he could tell how strong a bond I have with my father.
When I gave it to my Dad, he was speechless and he called it a piece of art. He emailed Mr. Kirby and told him thank you. He also told him it was too beautiful to hunt with and he was going to put it above his fireplace mantle. This kind of aggravated Mr. Kirby and he fired back an email saying he appreciated the thanks BUT his calls were meant to be used and strongly urged him to take it out. My Dad and I did and we made sure to be careful and that the weather conditions were perfect. Now that he has passed, we also agreed that we are going to video a hunt calling a gobbler in with this amazing call in honor of Mr. Kirby this spring. Stay tuned for that video.
When something like this happens, you need to realize how fragile life can be. Mr. Kirby touched us with more than a beautiful call. He reminded me of past hunts that my Father and I had. He reminded me about the tradition involved with this great sport. I am honored to have that experience and brief interaction with Mr. Kirby. Now to have such a piece of art to commemorate it makes it that more special. I am sure he is chasing an elusive bird as we speak where it is open season all the time. Happy hunting Mr. Dick Kirby and we will get one for you this spring!
PlotWatcher – Time-Elapse HD Video Camera Review
Monday, September 20th, 2010I started using trail cameras about 6 years ago. At that time, trail cameras were just starting to change from film to digital. I struggled with the early cameras due to hardware and software inefficiencies and just the fact that this technology was so brand new. Over the past few years as the cameras improved, I have built up an arsenal of 11 cameras. As you have read on my site, I have deployed my cameras in many ways and I consider myself more than a novice when using them.
A few months ago, I saw a well known game biologist using a top end trail camera (~$600) to take time elapse photos of a field in order to figure out where and when the turkeys were moving. I was unaware of time elapse capable cameras and I was quickly impressed by it. I personally cannot afford that brand of camera so I let the thought pass.
Then later that week I saw a forum post on Chasingame.com Website (my favorite trail camera review site) that was talking about the new Plot Watcher by Day 6 (View their Website).
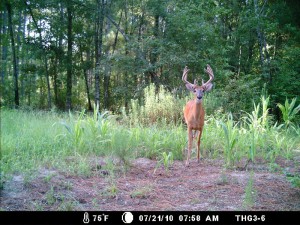
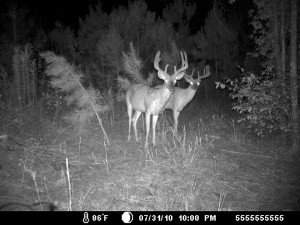
Shown below are some photos of this camera. Photos are from the Chasingame.com Website.
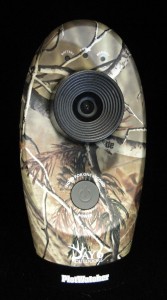
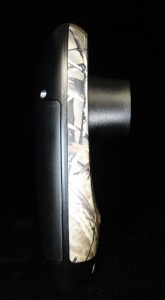
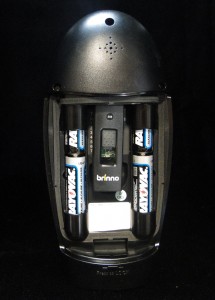
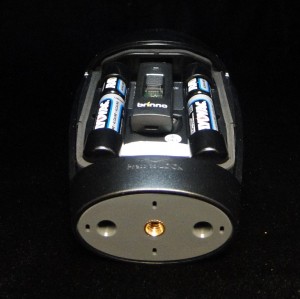
The PlotWatcher camera is a time elapse camera that costs around $200. Needless to say, I was impressed and I emailed them for a demo to test and write about on my Website. Rich, one of the owners, sent me one and was quick to point out that their camera is not meant to replace trail cameras but instead compliment it with a different type of data intelligence gathering for a hunter. He also pointed out that most of us use these tools to try to be more successful in our hunting ventures and this is another tool to help increase our odds if used correctly.
With this in mind, I started thinking about how I could us the PlotWatcher. The most obvious usage is to determine when and where deer are entering food plots. This could be handy in determining where to hang a stand and what time to hunt it. Also, it can tell you what kinds of deer are feeding in that area.
Next, I determined that I could use it the same way for turkeys. More and more people, including me, are using their trail cameras for scouting turkeys. In my opinion, the PlotWatcher might be better suited for this than trail cameras; especially in the spring when turkeys are doing their mating rituals in wide open areas.
Then, a few days later, I received a phone call about trespassers joy riding ATVs on one of our leases. Then it hit me to hang a PlotWatcher up in a tree to try to catch them. We are making preparations to try this idea and I am hoping for success. I will update you guys if we are successful in this new hunting venture.
So, with all these case uses in mind, I started to testing the camera. Now my review is not as in depth as Chasingame.com Website. These guys dissect everything, down to the nuts and bolts. Click here to read their Full Review on this camera. My review is from a general user using this product to determine the best ways to deploy it in the field.
The PlotWatcher uses 4 AA batteries and a USB thumb drive. I went out and bought an 8 gb drive (Verbatim Store’n’Go) for my test based on their recommendation. Day 6 has determined that certain drives use high speed data write technology to maximize battery performance (View their recommended USB drives).
Important Note: My luck stands true with new gear, and the 8 Gb USB drive that I bought from Office Max was defective and would not work correctly in the camera. Rich and their computer guy (Michael) helped me debug the system till I figured out it was the USB drive. I swapped the broken one for a new one and everything worked like advertised. These guys went over and above to help trouble shoot my problem.
You can configure the PlotWatcher either by turning the dial located inside the camera or you can custom configure it by using their software and writing the files to the USB drive. They have 6 different default time settings or you can custom designate the time using their software. I chose to test mine on 5 and 10 seconds all day. When I say all day, the camera only works during daylight hours. When it gets five dark photos, it shuts off for the night. It also can be programmed to shut down during the middle of the day when animal movement is minimal to increase battery life.
Now that I had the PlotWatcher ready to go, I ran a series of tests. You can place the camera in a monopod stick mount that comes with the camera or you can fasten it to a tree with the included straps. Since my hunting lease is located around a bunch of outlaws where a few of our trail cameras have been stolen, I decided to come up with a way to secure the Plot Watcher. I came up with the ole baking pan, couple of holes, and a good python cable as shown below in the photos. I then attached it to the tree. Maybe this will slow down any potential thief.
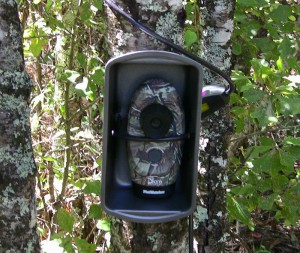
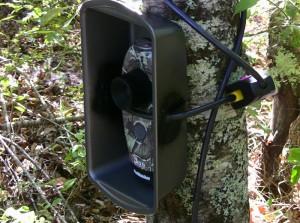
The actual PlotWatcher camera is only half of the system. Day 6 includes viewing software to assist you in viewing the daily clips in a speedy fashion. With this software you can view the photos like a video at different speeds. You can look at a whole day’s video in a few minutes. They even include a search function that can find animals in the photos. This feature actually worked better than I thought. It senses changes in one photo from the next and stops to display the change. Also, with this software you are able to download photos and videos of certain events. Shown below are a few screenshots of the software from the Chasingame.com Website.
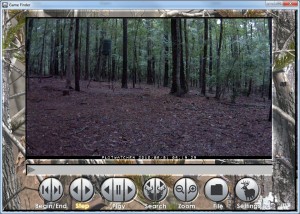
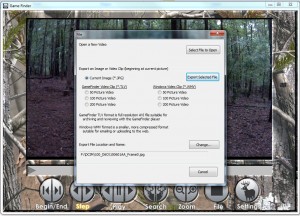
I have compiled a video that consists of setting up the camera, my actual game shots, and their software in action that you can view below.
I am totally impressed with the PlotWatcher and I want to thank Rich for allowing me to try it out. I am going to keep my demo units and I have them currently deployed on my hunting lease. Stay tune for more clips because I am sure there are going to be some interesting video caught by this new innovative camera system.
How to Make YOUR Own Tree Stand Safety System
Monday, September 13th, 2010The new Hunters Safety System (HSS) commercial hits home why you should have some type of safety system when you are in a tree stand. Click below to watch the commercial.
When I started bow hunting again, I decided that I need to be safe when I was up a tree; especially, since I am the sole provider for my family. So I bought a HSS vest and I liked it. I strapped it around the tree once I had climbed up. I thought I was safe. Then I read an article about tree stand accidents and learned that most falls happen when climbing up or down from the stand. I thought about it and realized my safety solution was inadequate.
Then one day I saw a safety system where the hunter strapped to a rope at the base of the stand and then climbed the stand while pushing the safety system up as they climb. So I got on the Internet and found a knot tying Web site and figured out to produce such a system. I am going to show you what we use in our bow stands. One more thing to note; I figured this out before HSS started selling a complete solution for around $40. My way is a lot cheaper but you have to tie the knots and put it together yourself.
Here are the steps:
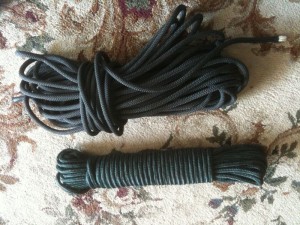
1. First thing you need is to cut the guide wire out of a good quality rope that has a safe working load of at least 300 pounds. I cut mine 18 to 19 foot long. My theory on length is to make it as high as your stand. Use a lighter to singe the ends of your cut rope and keep it from unraveling.
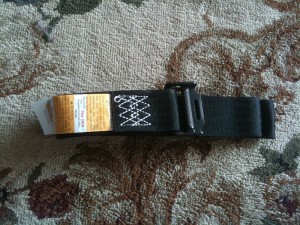
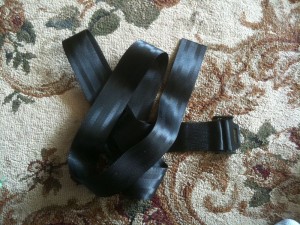
2. Next you need a strap to connect around the tree. If you do not have a tree strap, you can make a strap out of rope to connect to your guide rope or use a ratchet strapped to itself. All new tree stands come with a safety harness which includes a tree strap. So, if you have bought some new stands in the past few years, you have a tree strap already.
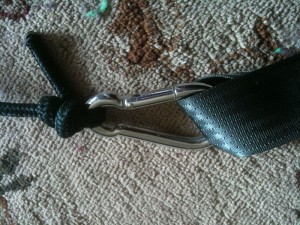
3. Now, tie the guide rope to a carabiner using a figure 8 knot. Photo from Real Knots

4. You can then connect the guide rope to your tree strap using the carabiner.
5. Finally, you will need to make a prussic knot. The prussic knot is attached to the guide rope where it travels up and down and your safety vest or belt is attached to it. Photo from Adventures to the Edge
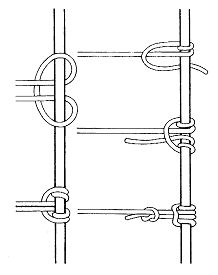
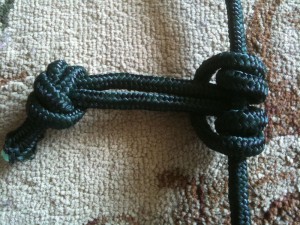
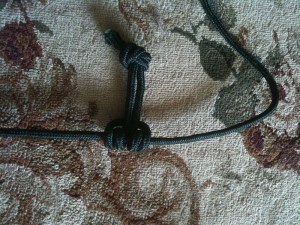
6. Now all you need is some type of safety vest or harness to attach to it.
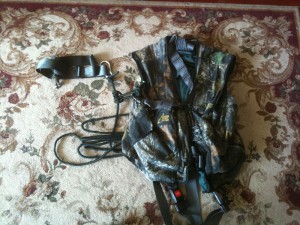
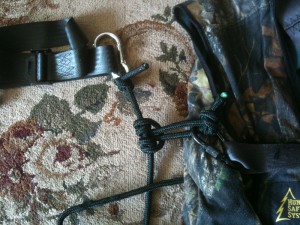
Shown below are pictures of this system installed on one of our bow stands.
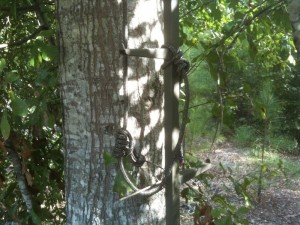
Tied off at the base with the Prussic Knot showing.
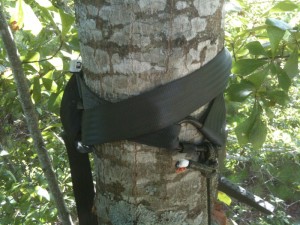
Tree strap at the top
Here is video of me using it to get up to my stand.
No excuses. Make your own and be safe.
Fishing for Whitetail Bucks
Tuesday, July 20th, 2010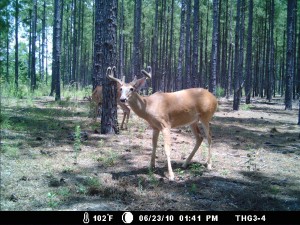
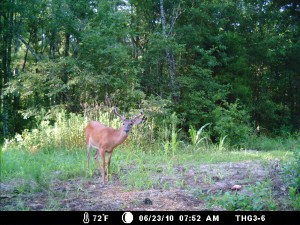
So by now you are asking, how do you fish for whitetail bucks? Obviously you do not do it with a fishing rod. It is a term that I use to describe a technique to locate and pattern big bucks using trail cameras. I have been developing this technique for the last 3 years and I thought I would share it with you.
The first thing I do, whether it is hunting a new area or an area that I have hunted before, is to study aerial maps to determine the possible core area of these bucks. I look for areas where there will be food for the spring and summer and the areas that provide them the best cover and protection. I have discovered that bucks have summer core areas that they have been using for years. When you see young bucks traveling with older bucks during this time, you can bet that the young bucks will take over these core areas as they get older.
The next thing I do is I gather past data if I have some to determine my initial locations. If it is a location that I got good buck photos the year before, then I will automatically begin with a camera setup at that location. Then I will start compiling past information together while studying the aerial maps again and trying to think like a whitetail buck. This is why I call it fishing. You theoretically “throw the cameras” out there in locations that look promising then start adjusting as time goes by.
Once I have all my locations on paper, I will get some type of attractant to put in front of these cameras. I will use corn, soybeans, mineral blocks, etc… to try to get the bucks in front of the cameras so it will take their picture.
I normally try to put out enough attractant to last 2 to 3 weeks. Once this time is up, I will go and collect all the memory cards and study the photos. I will not put additional attractant out or remove a camera until I have looked at the photos and determined the effectiveness of that location. One thing I have noticed over the years is that some locations are better early and some are better later. Why is this? It is due to what the bucks are eating. They could be eating fresh growth such as honey suckles, plums, and/or blackberries early in the season and then switch to agriculture crop fields later when they become mature and more edible. Once again, try to think like a whitetail buck.
Once I have revamped my strategy, I will then go back and put out my attractant and move the other cameras to new locations. This is the recasting part of the fishing analogy. I will normally start this process after May 15th and I will continue until September 1st. September 11th is opening day for archery in Georgia and that is the reason I stop September 1st.
From this process, I will determine travel patterns of these bucks and will start developing bow stand locations to intercept them during the daylight hours. One more thing to note is that I try to move cameras along trails to see if I can get more than one series of photos of a particular buck. If you can map his travel and what time of day/night he is traveling this can be some key intelligence in harvesting him. I have a future case study of a buck that I was successful in mapping his travel route.
Now all this work is great for the preseason and understanding their summer pattern. These bucks will stay on this pattern in their bachelor groups but they will tend to start to roam further as they rub their velvet off and the testosterone starts to increase in their body. It still gives you a great starting point to know where the bucks are in the area and what they are doing.
Now I have been talking about bucks BUT as you gather and compile all your photos, make notes as to what does are in those areas. I try to identify the does that have twins which I would consider “breeder” does. I also try to indentify the does that have their fawns first. These are the does that come into estrus first and therefore are bred first. I believe these mature bucks know who these does are from past years. These does normally have a 200 to 300 acre core area and when the pre-rut and initial early rut phases start, you want to be hunting them, due to this fact. Mature bucks will be roaming this area looking for the first does in season and you will be sitting there waiting.
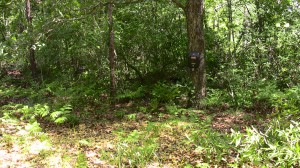
Shown below are a few pictures of my trail cameras and attractant setups. I like to set my cameras pointing either North or South so that the rising or setting sun does not set off the camera sensor. I also like to trim all the brush, grass, or small trees around my location. I will use a brush axe or I like to use a weed eater to trim the grass back. I learned this lesson of not trimming one time and I got over a 1000 pictures of a bush going back and forth in the wind.
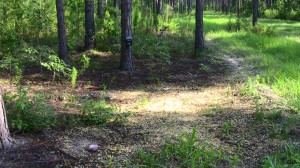
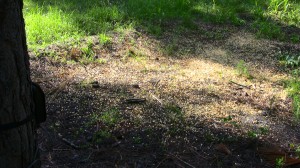
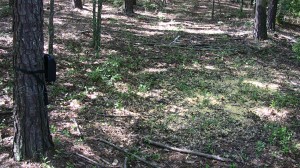
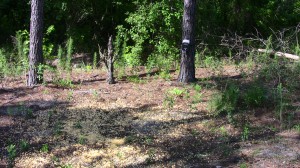
Now I also filmed some video of me setting up a fishing spot with some other locations that I am currently using. I also included some deer photos to these locations to show you what I have caught. Watch the video and you might see something that might help you while setting up your spots.
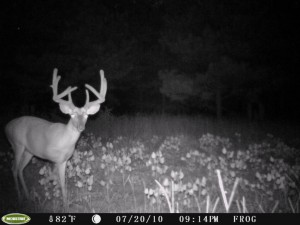
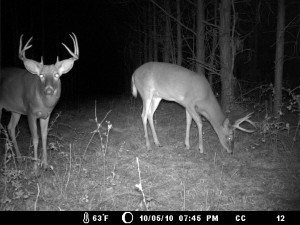
I mentioned a case study earlier in this article and once I have gathered all of the photos for the summer, I will post an article about the success of this year’s fishing. This data always helps me revise my technique and allow me time to reevaluate my success and failures. In the meantime, here are some photos of the deer I have caught while fishing this year. Stay tuned for more photos as I re-bait my hooks and start to cast again.
Trail Cameras – the Good, the Bad, and the Ugly
Wednesday, July 14th, 2010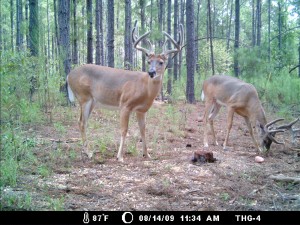
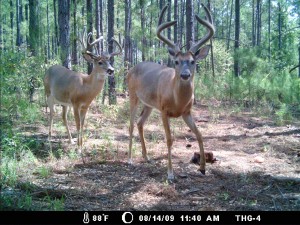
Every hunter by now has heard of trail cameras and chances are that most of you are currently using them. I use them for all of my hunting ventures and I wanted to discuss some of the pros and cons of using them.
The Good – Affordable trail cameras became available for hunting about 5 years ago. At first, there were only a few manufacturers making these cameras with few models to choose from. Now, there are dozens of manufacturers with even more cameras on the market. These cameras have constantly gone down in price while their performance and functionality have increased many times since the earlier models. The original versions were filmed camera where you had to take them in for photo development but they quickly evolved to all digital cameras with portable storage medium to be viewed on a computer. Now, they have even introduced new models that can send photos over the cellular network to you while you are at home via email or text message to your cellular phone.
A need for a motion based camera first came about during the beginning of the quality deer management movement over 30 years ago. Wildlife biologists needed a way to perform research through photos. Some of the first cameras were crude and worked only part of the time but with any new technology they have kept evolving to give us the technologically advanced cameras we have today.
So with that history in mind, trail cameras are used to detect what game you have on your property. This information can be critical in determining such things as deer density (deer/square mile), body size (determines health), and the sex ratio of does to bucks or gobblers to hens. These are critical components in any type of quality management program.
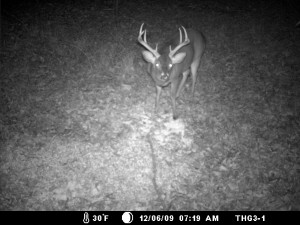
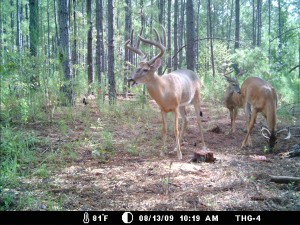
The most common way a good management program will use trail cameras is to take a census before deer season with cameras placed every 100 acres over some type of attractant for a couple of weeks. Then the photos would be viewed and the information recorded. Then after deer season, another census is taken recording the same information. Most biologists recommend a census twice a year.
Another good use of trail cameras is to document which deer you want to shoot and which ones you want to live. I have seen photo albums at deer camps that I have visited with what they called “The Hit List” containing the deer they wanted to harvest.
In my opinion most deer hunters buy cameras to pattern deer. They want to know what kind of deer and what time do they come by my deer stand, food plot, etc… I think of my cameras as hunting for me when I cannot be there. They are much more patient and as long as I have fresh batteries and an empty memory card, they will hunt hard for me. It is like Christmas morning when you get the memory card back and start looking through the photos and finding a new buck you have never seen.
Setting up trail cameras to capture deer pictures is also a challenge. It is a fun way to pass the time during the off season that can lead to benefits during the hunting season. There is an art and science to setting them up and experience comes with trial and error. I can tell you stories about how I had the most perfect setup and when I came back 3 weeks later, I realized I forgot to turn the camera on or a bush waved back and forth in front of the infrared sensor filling up my memory card or something dumb like that. Oh, the stories I could tell.
The Bad – I have come to witness two bad things while using my trail cameras. 5 years ago when I first started using them I would find myself wanting to check the cameras every day for new pictures. I had to literally go into withdrawal to break this habit. I was finding that when I checked them every day I was disturbing the area with noise and scent and later when I hunted it, I was not seeing the deer I once saw before. I was trying to use my cameras to pattern deer but in return my obsessive behavior of checking the cameras were causing me to be patterned by the deer. This was a bad way to use this technology. So now when I check my cameras, I am normally going to hunt that location and I will check the camera after I get through hunting or if I have been gone for a period of time, I will check my cameras during the midday when the deer are normally bedded down to see what spots I want to hunt later.
Here is an example of the second bad way to use them. I had a good spot over a food plot where I normally placed one of my trail cameras. This spot had always been productive but this year, every time I checked the camera; there were only a few photos of deer. Instead of looking at tracks and other signs, I assumed that the deer were not attracted to that food plot and I chose not to invest my time hunting that location. Well, at the end of the season when I was pulling my cameras out, I noticed that the camera was not taking my picture when I walked up to it. Low and behold, the motion sensor was broken and was not taking pictures 90% of the time. I looked around and sure enough the food plot had been grazed like cows and there were rubs and scrapes all around with a couple of big ole’ buck tracks. The Bad was that I trusted my camera and forgot about all the other good woodsmanship that I had learned over the years causing me to neglect a great spot. Needless to say, I did not let that happen anymore. Trail cameras are to be used as a tool in conjunction with other scouting techniques but like life, I had to learn the hard way.
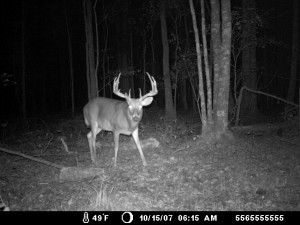
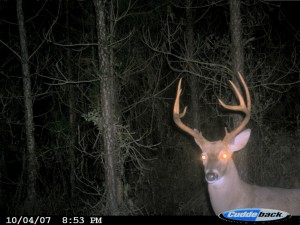
The Ugly – Now that you now my opinions on the Good and the Bad of trail cameras, let me talk about the Ugly. What could possibly be Ugly about trail cameras? Nothing is Ugly about the cameras, just the photos they take. I can remember a time the only way you knew a big buck was in an area was to see his track or rub tree or actually see him. I like to think that ignorance was bliss back then when I was sitting on a stand waiting. But now you have photographic proof that a big buck was there and that he was a 10 point that could score 145” B.C. He has been at your food plot every evening right before dark. Then you start thinking, if I go today and the rest of the week, he will most likely be there. I do not care how many times I have hunted that stand. I don’t care the wind is wrong. I am dying because I have to be at work instead of on that stand. If I could just hunt that location, I can get that deer. These kinds of statements can make you obsessed, even crazy. This is the Ugly. I have seen people walk around with the photos in their pockets and even on their phones. I must confess that I am guilty of this. It is true that one picture is worth a thousand words but one trail camera picture of a big buck can consume the everyday thoughts of a hunter to the point of obsession.
Let me give you an example of this Ugly in action. I was working one summer on getting my hunting lease ready for deer season. I got a picture of a huge 10 point that later scored 144” B.C. I became obsessed with this deer. I named him and did everything possible to get ready to hunt him. Opening day of deer season came around and went and I could not get a shot at this deer. The trail camera photos made me feel like this deer was for me to take. About 3 weeks into the season, a good buddy on my lease ½ mile away from where I had been getting the pictures of the one I wanted called me and said he had killed a big buck. I went to help him load it up and I was all excited for him and low and behold it was the deer I was after. I was heartbroken and depressed at first but then I was later relieved to know that the pressure was off. This whole situation was definitely Ugly to me.
Would I do it again? You better believe it. I would rather go through the agony of knowing that a big buck is in the area than to go in it blind. Knowing that a big buck was there put spring in my step when I got up in the mornings. It made me hunt a little longer and get on the stand a little earlier. It made me hunt harder paying attention to the little details. Later that season I took two nice bucks and I believe that obsessive hunting over one buck made me a better hunter for the later success.
So in conclusion, I recommend using trail cameras but keep these points in mind when setting them up, and if you get a picture of that big buck, try to get a good night’s sleep and stay sane when hunting them. Trail cameras have proven to be a powerful tool in my hunting arsenal but remember to walk that fine line between sanity and obsession. Good luck!