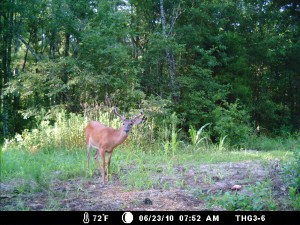
Fishing for Whitetail Bucks

July 20th, 2010


So by now you are asking, how do you fish for whitetail bucks? Obviously you do not do it with a fishing rod. It is a term that I use to describe a technique to locate and pattern big bucks using trail cameras. I have been developing this technique for the last 3 years and I thought I would share it with you.

The first thing I do, whether it is hunting a new area or an area that I have hunted before, is to study aerial maps to determine the possible core area of these bucks. I look for areas where there will be food for the spring and summer and the areas that provide them the best cover and protection. I have discovered that bucks have summer core areas that they have been using for years. When you see young bucks traveling with older bucks during this time, you can bet that the young bucks will take over these core areas as they get older.
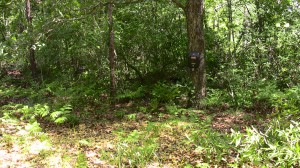
The next thing I do is I gather past data if I have some to determine my initial locations. If it is a location that I got good buck photos the year before, then I will automatically begin with a camera setup at that location. Then I will start compiling past information together while studying the aerial maps again and trying to think like a whitetail buck. This is why I call it fishing. You theoretically “throw the cameras” out there in locations that look promising then start adjusting as time goes by.

Once I have all my locations on paper, I will get some type of attractant to put in front of these cameras. I will use corn, soybeans, mineral blocks, etc… to try to get the bucks in front of the cameras so it will take their picture.

I normally try to put out enough attractant to last 2 to 3 weeks. Once this time is up, I will go and collect all the memory cards and study the photos. I will not put additional attractant out or remove a camera until I have looked at the photos and determined the effectiveness of that location. One thing I have noticed over the years is that some locations are better early and some are better later. Why is this? It is due to what the bucks are eating. They could be eating fresh growth such as honey suckles, plums, and/or blackberries early in the season and then switch to agriculture crop fields later when they become mature and more edible. Once again, try to think like a whitetail buck.

Once I have revamped my strategy, I will then go back and put out my attractant and move the other cameras to new locations. This is the recasting part of the fishing analogy. I will normally start this process after May 15th and I will continue until September 1st. September 11th is opening day for archery in Georgia and that is the reason I stop September 1st.

From this process, I will determine travel patterns of these bucks and will start developing bow stand locations to intercept them during the daylight hours. One more thing to note is that I try to move cameras along trails to see if I can get more than one series of photos of a particular buck. If you can map his travel and what time of day/night he is traveling this can be some key intelligence in harvesting him. I have a future case study of a buck that I was successful in mapping his travel route.

Now all this work is great for the preseason and understanding their summer pattern. These bucks will stay on this pattern in their bachelor groups but they will tend to start to roam further as they rub their velvet off and the testosterone starts to increase in their body. It still gives you a great starting point to know where the bucks are in the area and what they are doing.

Now I have been talking about bucks BUT as you gather and compile all your photos, make notes as to what does are in those areas. I try to identify the does that have twins which I would consider “breeder” does. I also try to indentify the does that have their fawns first. These are the does that come into estrus first and therefore are bred first. I believe these mature bucks know who these does are from past years. These does normally have a 200 to 300 acre core area and when the pre-rut and initial early rut phases start, you want to be hunting them, due to this fact. Mature bucks will be roaming this area looking for the first does in season and you will be sitting there waiting.

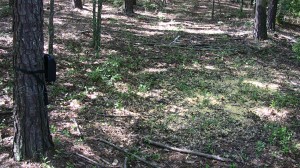
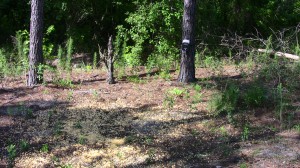
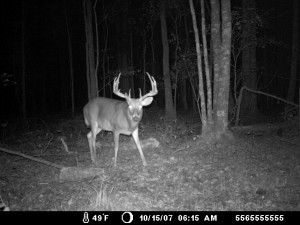
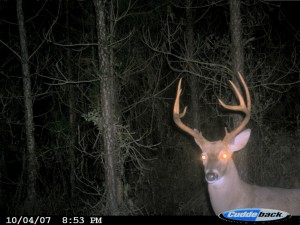
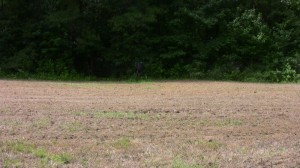
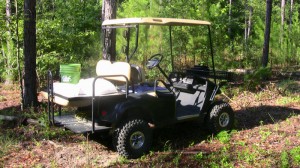
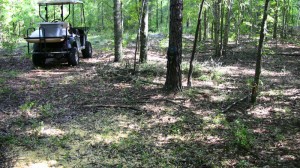
Shown below are a few pictures of my trail cameras and attractant setups. I like to set my cameras pointing either North or South so that the rising or setting sun does not set off the camera sensor. I also like to trim all the brush, grass, or small trees around my location. I will use a brush axe or I like to use a weed eater to trim the grass back. I learned this lesson of not trimming one time and I got over a 1000 pictures of a bush going back and forth in the wind.
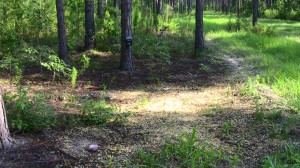
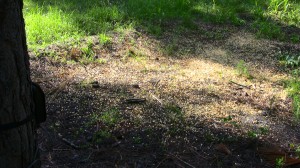


Now I also filmed some video of me setting up a fishing spot with some other locations that I am currently using. I also included some deer photos to these locations to show you what I have caught. Watch the video and you might see something that might help you while setting up your spots.

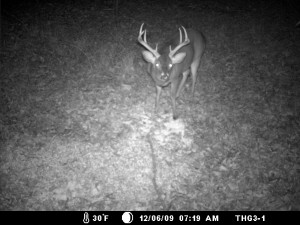
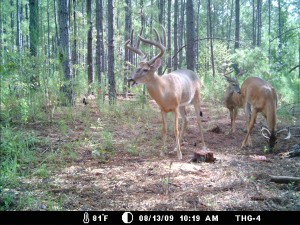
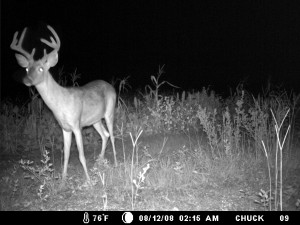
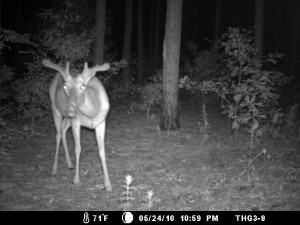
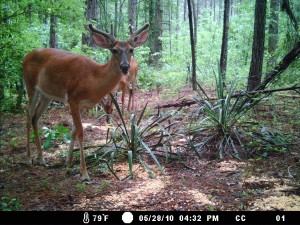
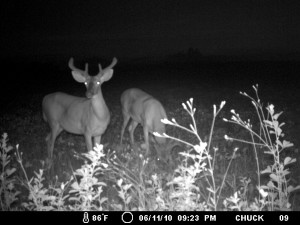
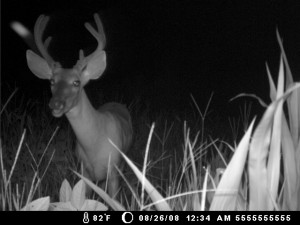
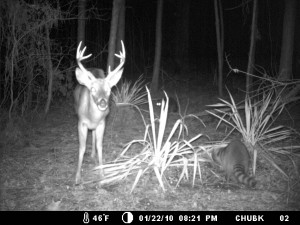
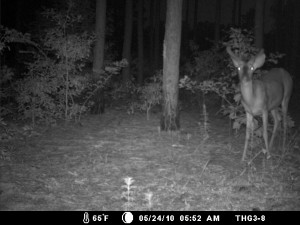
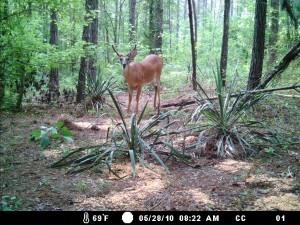
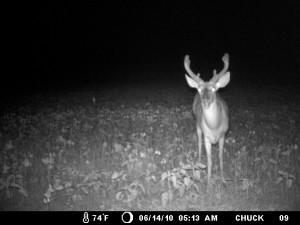
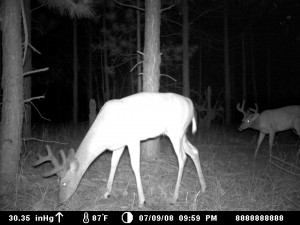
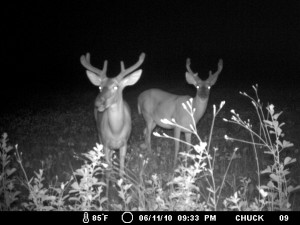
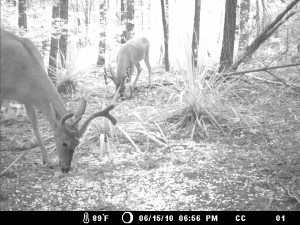
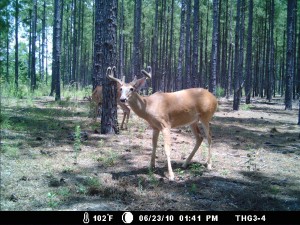
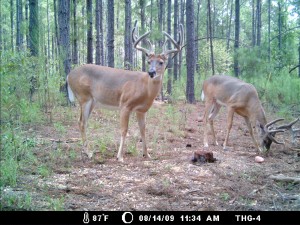
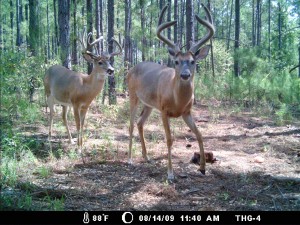
I mentioned a case study earlier in this article and once I have gathered all of the photos for the summer, I will post an article about the success of this year’s fishing. This data always helps me revise my technique and allow me time to reevaluate my success and failures. In the meantime, here are some photos of the deer I have caught while fishing this year. Stay tuned for more photos as I re-bait my hooks and start to cast again.
Trail Cameras – the Good, the Bad, and the Ugly

July 14th, 2010

Every hunter by now has heard of trail cameras and chances are that most of you are currently using them. I use them for all of my hunting ventures and I wanted to discuss some of the pros and cons of using them.

The Good – Affordable trail cameras became available for hunting about 5 years ago. At first, there were only a few manufacturers making these cameras with few models to choose from. Now, there are dozens of manufacturers with even more cameras on the market. These cameras have constantly gone down in price while their performance and functionality have increased many times since the earlier models. The original versions were filmed camera where you had to take them in for photo development but they quickly evolved to all digital cameras with portable storage medium to be viewed on a computer. Now, they have even introduced new models that can send photos over the cellular network to you while you are at home via email or text message to your cellular phone.

A need for a motion based camera first came about during the beginning of the quality deer management movement over 30 years ago. Wildlife biologists needed a way to perform research through photos. Some of the first cameras were crude and worked only part of the time but with any new technology they have kept evolving to give us the technologically advanced cameras we have today.

So with that history in mind, trail cameras are used to detect what game you have on your property. This information can be critical in determining such things as deer density (deer/square mile), body size (determines health), and the sex ratio of does to bucks or gobblers to hens. These are critical components in any type of quality management program.

The most common way a good management program will use trail cameras is to take a census before deer season with cameras placed every 100 acres over some type of attractant for a couple of weeks. Then the photos would be viewed and the information recorded. Then after deer season, another census is taken recording the same information. Most biologists recommend a census twice a year.

Another good use of trail cameras is to document which deer you want to shoot and which ones you want to live. I have seen photo albums at deer camps that I have visited with what they called “The Hit List” containing the deer they wanted to harvest.

In my opinion most deer hunters buy cameras to pattern deer. They want to know what kind of deer and what time do they come by my deer stand, food plot, etc… I think of my cameras as hunting for me when I cannot be there. They are much more patient and as long as I have fresh batteries and an empty memory card, they will hunt hard for me. It is like Christmas morning when you get the memory card back and start looking through the photos and finding a new buck you have never seen.

Setting up trail cameras to capture deer pictures is also a challenge. It is a fun way to pass the time during the off season that can lead to benefits during the hunting season. There is an art and science to setting them up and experience comes with trial and error. I can tell you stories about how I had the most perfect setup and when I came back 3 weeks later, I realized I forgot to turn the camera on or a bush waved back and forth in front of the infrared sensor filling up my memory card or something dumb like that. Oh, the stories I could tell.

The Bad – I have come to witness two bad things while using my trail cameras. 5 years ago when I first started using them I would find myself wanting to check the cameras every day for new pictures. I had to literally go into withdrawal to break this habit. I was finding that when I checked them every day I was disturbing the area with noise and scent and later when I hunted it, I was not seeing the deer I once saw before. I was trying to use my cameras to pattern deer but in return my obsessive behavior of checking the cameras were causing me to be patterned by the deer. This was a bad way to use this technology. So now when I check my cameras, I am normally going to hunt that location and I will check the camera after I get through hunting or if I have been gone for a period of time, I will check my cameras during the midday when the deer are normally bedded down to see what spots I want to hunt later.

Here is an example of the second bad way to use them. I had a good spot over a food plot where I normally placed one of my trail cameras. This spot had always been productive but this year, every time I checked the camera; there were only a few photos of deer. Instead of looking at tracks and other signs, I assumed that the deer were not attracted to that food plot and I chose not to invest my time hunting that location. Well, at the end of the season when I was pulling my cameras out, I noticed that the camera was not taking my picture when I walked up to it. Low and behold, the motion sensor was broken and was not taking pictures 90% of the time. I looked around and sure enough the food plot had been grazed like cows and there were rubs and scrapes all around with a couple of big ole’ buck tracks. The Bad was that I trusted my camera and forgot about all the other good woodsmanship that I had learned over the years causing me to neglect a great spot. Needless to say, I did not let that happen anymore. Trail cameras are to be used as a tool in conjunction with other scouting techniques but like life, I had to learn the hard way.

The Ugly – Now that you now my opinions on the Good and the Bad of trail cameras, let me talk about the Ugly. What could possibly be Ugly about trail cameras? Nothing is Ugly about the cameras, just the photos they take. I can remember a time the only way you knew a big buck was in an area was to see his track or rub tree or actually see him. I like to think that ignorance was bliss back then when I was sitting on a stand waiting. But now you have photographic proof that a big buck was there and that he was a 10 point that could score 145” B.C. He has been at your food plot every evening right before dark. Then you start thinking, if I go today and the rest of the week, he will most likely be there. I do not care how many times I have hunted that stand. I don’t care the wind is wrong. I am dying because I have to be at work instead of on that stand. If I could just hunt that location, I can get that deer. These kinds of statements can make you obsessed, even crazy. This is the Ugly. I have seen people walk around with the photos in their pockets and even on their phones. I must confess that I am guilty of this. It is true that one picture is worth a thousand words but one trail camera picture of a big buck can consume the everyday thoughts of a hunter to the point of obsession.

Let me give you an example of this Ugly in action. I was working one summer on getting my hunting lease ready for deer season. I got a picture of a huge 10 point that later scored 144” B.C. I became obsessed with this deer. I named him and did everything possible to get ready to hunt him. Opening day of deer season came around and went and I could not get a shot at this deer. The trail camera photos made me feel like this deer was for me to take. About 3 weeks into the season, a good buddy on my lease ½ mile away from where I had been getting the pictures of the one I wanted called me and said he had killed a big buck. I went to help him load it up and I was all excited for him and low and behold it was the deer I was after. I was heartbroken and depressed at first but then I was later relieved to know that the pressure was off. This whole situation was definitely Ugly to me.

Would I do it again? You better believe it. I would rather go through the agony of knowing that a big buck is in the area than to go in it blind. Knowing that a big buck was there put spring in my step when I got up in the mornings. It made me hunt a little longer and get on the stand a little earlier. It made me hunt harder paying attention to the little details. Later that season I took two nice bucks and I believe that obsessive hunting over one buck made me a better hunter for the later success.

So in conclusion, I recommend using trail cameras but keep these points in mind when setting them up, and if you get a picture of that big buck, try to get a good night’s sleep and stay sane when hunting them. Trail cameras have proven to be a powerful tool in my hunting arsenal but remember to walk that fine line between sanity and obsession. Good luck!

Food Plots with a GroundHog MAX

July 12th, 2010

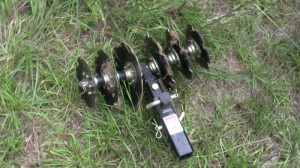
I have always been lucky to have access to tractors and all their implements for our lease property in Georgia, but my Dad and I have property in Mississippi that we have permission to hunt where we do not have a tractor. In the past, we have either had to rely on someone else to plant our food plots or we just went without. We have always wanted this capability and self sufficiency and we finally found it with an ATV plow called GroundHog MAX by Tufline (http://www.atvplowsplus.com/).

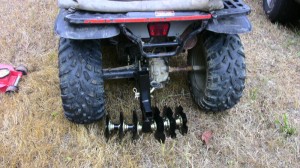
The plow itself weighs about 60 pounds and mounts to your ATV in a 2 inch receiver. If your ATV does not have a receiver, like ours did not, then it comes with a 2 inch tube and all the hardware necessary to mount the GroundHog MAX. Shown below is our installation on our 1999 Polaris Magnum 325. We also mounted it on our 1998 Polaris Magnum 500 for more power.


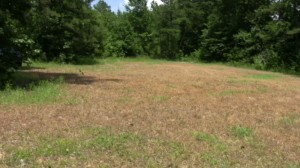
Now that we have the GroundHog MAX installed we were ready to try it out. My Dad and I picked one of our fall food plots and we decided to plant some Eagle soybeans and sunflower seeds. So my Dad started us off by mowing the food plot with his riding lawnmower. Then a week later he sprayed the new growth with roundup by using a hand sprayer as shown below. This process worked really well and gave us easier access to bare dirt to work with.

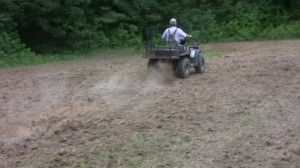
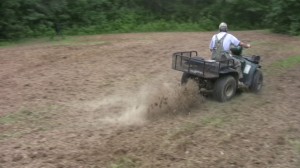
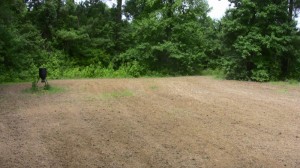
Then, a week later we used the GroundHog MAX to plow up the ground. It took us about 30 minutes to break it up with about 3 passes. In the video you can watch it and see the GroundHog MAX tear it up. Next we spread our seeds with a hand spreader and used an old fence gate to drag behind our ATV to cover the seed. Now we pray for rain.


The big thing we learned during this process is to spray your food plots with roundup before you plow. This cuts down the number of times you have to disc it up. Enjoy the video of some of our work with the GroundHog MAX and planting this food plot.

2WD Golf Carts May Work For You vs. the Expensive 4WD Versions

July 7th, 2010

I purchased a customized two wheel drive (2WD) golf cart last summer. I bought this golf cart accepting it was a 2WD because I could not afford the four wheel drive (4WD) versions you see advertised on TV. Let me tell you, unless you have land that is in a swamp or constantly covered in mud, the 2WD will get you around where you need. I use my cart to cruise our lease, re-fill feeders, move deer stands, etc… The list goes on and on. It is a real handy tool for getting around on our property and the fact that you can use it drive up to your location in the woods is very handy. Not to mention it is a great way to get around turkey hunting with all your gear. I do recommend you get a winch on your cart in case you do get stuck.

My point of this blog entry is to inform you that a 2WD golf cart may be the cheaper option but it might be all you need for your hunting adventures. I do love my golf cart.

Our Turkeys – From Eggs to Poults

July 2nd, 2010

Back on May 11th (previous blog post), I found a nest of turkey eggs. Now, on my recent trip back to our club, I saw 3 hen turkeys with multiple turkey poults feeding in a field. I filmed it free handed from the truck so the quality is not as good, but it was pretty cool watching how the 3 hens were herding the young ones in the direction they wanted them to go. It is nice to see Mother Nature hard at work. Enjoy the video.

First Bow Practice of the Year

June 29th, 2010

Today I picked up my bow for the first time since last October in preparation for this year’s bow season (September 11th). I wanted to start practicing and also see what parts of my bow needed tuning up by my bow shop. I shot this video to just play around with different camera angles. Also, I wanted to practice my video editing skills. So if you watch this video, it is not a how to shoot a bow but instead someone having fun shooting and videoing.

Feed Station 101 – What works for us!

June 24th, 2010

Here is a video I shot of one of our feed stations in Georgia. I wanted to share our setup with anyone who might be interested. First, we have a spinner feeder set to go off at different times of day. Currently during the summer we run it at 7:00 a.m. for about 4 to 5 seconds, since the deer are not consuming as much carbohydrates in their main diet at this time of year. The spinner feeder conditions them to check the feed station on regular intervals to see what feed is available. We also have a feed trough were we put corn, soybeans, and some supplemental feed between April and July when bucks are growing antlers and does are nursing their fawns. We also have a landscaping pool (that someone was throwing away in my neighborhood) to provide a good source of water. Finally we have mineral blocks placed on a hilly spot where we keep minerals year round. We run a camera almost a year round at this location to monitor which deer are using this station. Watch the video and see if this setup can help you in your wildlife management plan.

Following Antler Growth with Trail Cameras

June 21st, 2010

The great part about having a wildlife management plan is watching certain deer grow up to maturity. We run a lot of trail cameras during the year. Sometimes as many as 20 cameras will be out capturing deer and their behavior. We name our bucks and we start watching them normally when they are 2 ½ year olds. This year we have two bucks that we know from previous years that we are watching and are getting trail camera photos. Luckily for us, they are traveling together so that will make monitoring them that much easier. I thought I would show you some of their pictures and hopefully we can continue to get pictures of them through their antler growing season.

The first buck is a 4 ½ year old that I call Mr. Potential. Shown below is a picture of him from August 2008 as a 2 ½ year old. For some reason we never got a photo of him as a 3 ½ year old.

Now this is him as a 4 ½ year old. These 3 pictures show how fast his antlers are growing. They were taken on May 24th, May 28th, and June 11th.


The other buck traveling with him is also a 4 ½ year old that I call No Brow Jr. These names have a long story and I am not going to go in it at this time. Shown below are pictures of him as a 2 ½ year old from 2008 and a picture of him as a 3 ½ year old at the end of gun season last year (2009-2010).


These pictures below are photos of him as a 4 ½ year old this year and the type of head gear he is growing. They were taken on May 24th, May 28th, and June 14th.


Another interesting thing about these two bucks is that they have been traveling together during the spring/summer for the past 3 years. Shown below is a photo taken of them back in 2008 and the other two below are from this year 2010.


I hope you enjoyed these photos and the history behind these two deer.

Bug Crazy Buck

June 9th, 2010

I decided to sit in one of our other tower stands to see how many deer were using that food plot. During this time, I got video of this young buck with his sister and his mother. In this video, you can see how the flies and gnats bother this buck to such a point where he starts acting crazy and jumping around. This is real funny to me to witness in the wild. I thought I was the only one the gnats bothered. Enjoy the video.

Deer Are Eating Machines

June 7th, 2010

While sitting on our power line food plot, I filmed this young buck feeding on our soybeans and iron and clay peas. Last year we only planted 2 acres and the deer ate it all up in less than 3 weeks when it first came up. Watching this video showed me how efficient these deer can eat while the food plot is in its early stage. We planted almost 8 acres this year. Hopefully we can get the food plot up before they can mow it down like last year.